You've added a block to a preset and realize one of its parameter values is incorrect. Do you have to remove the block and start over? No, you can adjust the block parameter values to your liking and then update that specific block within the preset. There are several ways to do this, as outlined below.
To update a block in a preset (using the All Presets dialog box):
- In your Processing Map (in the Processing Workspace), locate the block in question and configure it correctly for your preset. If you want to start with the block values currently saved to your preset, you need to activate or assert the preset prior to beginning this procedure.
- Add the block to the preset. Its values will overwrite the block's values already contained in the preset.
To update a block in a preset (using the individual preset properties dialog box):
- In your Processing Map (in the Processing Workspace), locate the block in question and configure it correctly for your preset. If you want to start with the block values currently saved to your preset, you need to activate or assert the preset prior to beginning this procedure.
-
In the Processing Workspace toolbar, click Presets to open the All Presets dialog box.
- Locate the preset you want and click its name to open its properties dialog box.
- In the properties dialog box, locate the block you want to update and click its corresponding Update button.

To update a block in one or more presets (using the block's Preset References dialog box):
- In your Processing Map (in the Processing Workspace), locate the block in question and configure it correctly for your preset. If you want to start with the block values currently saved to your preset, you need to activate or assert the preset prior to beginning this procedure.
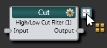
- Access the block's Preset References dialog box by clicking the preset icon located to the right of the block:
- In the Preset References dialog box, click the Update button associated with the relevant preset:

tip: If you want to update a block in multiple presets, simply leave the Preset References dialog box open, make the necessary changes to the block, and click the appropriate Update button. Repeat this process for each preset. This is a handy way to focus your attention on a single block, thinking about its configuration for each of its presets.
To update multiple blocks in a preset:
- In your Processing Map (in the Processing Workspace), locate the blocks in question and configure them correctly for your preset. If you want to start with the block values currently saved to your preset, you need to activate or assert the preset prior to beginning this procedure.
- Highlight all the relevant blocks by clicking and dragging over them with your cursor or by clicking each block while holding the Shift key.
- In the Processing Workspace toolbar, click Presets to open the All Presets dialog box.
- Locate the relevant preset in the All Presets dialog box. You may need to click one of the tabs (Toggle, Selector, or Command) to find the preset.
- Click the preset bar on one of the highlighted blocks and drag it onto the preset drop target for the relevant preset. This drag and drop operation adds and/or updates all the highlighted blocks (and associated control links) in the preset.
 See Also
- About Presets
- Adding a Block to a Preset
- Adding a Link to a Preset
- Deleting a Preset Selector Group
- Deleting a Preset
- Moving a Preset to a Different Type or Selector Group
- Removing a Block from a Preset
- Updating a Block in a Preset
- Viewing All Presets and Active Presets
- Viewing the Contents of a Preset
- Viewing the Presets in Which a Block is Included