The Pager1 RAD is the paging station hardware designed to work seamlessly with the HAL paging system. Although you can accomplish simple paging tasks with the Paging Station block, we highly recommend the Pager1—unless your paging needs are simple enough to use only one or two paging Scenarios and a push-to-talk paging microphone with a built-in switch. The Pager1 has many features that enhance the end user's experience, not to mention features that simplify the design, installation, and testing of the paging system. For more details on the Pager1 hardware, see The Pager1 Paging Station.
To add and configure the Pager1 hardware:
- In the Hardware Workspace palette, expand the Remote Audio Devices category.
- Locate the Pager1 device and drag and drop it onto a RAD port in the Hardware Map. (You can also add the Pager1 by double-clicking it in the palette. Halogen adds it to the next available RAD port.)
- If desired, create a custom name for the pager. If you have multiple pagers, naming them is highly recommended. To customize the name, click anywhere in the white bar above the pager and type the name in the edit box that appears. Click X to save the name and close the edit box. You can also customize the name of the microphone channel.
- Like most all other RADs, you can also configure the Backlight Settings for the Pager1. You do so from its properties dialog box, which you open by double-clicking the Pager1 in the Hardware Map or hovering over its title bar and clicking the properties icon that appears.
To add and configure the Pager1 processing block:
- In the I/O palette in the Processing Workspace, expand the Remote Audio Device Ports category, if necessary, and locate the Pager1 device that you just added.
- Drag the Pager1 block into the Processing Map. It doesn't matter where you drop it as you will not be wiring it into the system. The HAL System does the wiring for you—behind the scenes!
- Customize the block's Station name. This is the name that will appear in the Stations column in the Paging Manager. If you have multiple paging stations in your system, we highly recommend customizing this name. To do so, click the block's green Station rectangle and then type a name in the text box that appears. Click X to save the name and close the text box.
- Open the block's properties by double-clicking the block or hovering and clicking the properties icon that appears in the upper right of the block's title bar. The following dialog box displays:
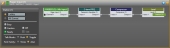
- As you can see, there are three wired processing blocks contained within the Pager1 block: Mic Input, Compressor, and 2-band PEQ. Each block has an associated properties dialog box containing parameters for that block. Open the properties for each block and configure them as necessary. For the Mic Input, you can adjust the Sensitivity and Level parameters. You can also mute the microphone. And if you want to give end users control over the page volume and/or mute, you can link each of these controls to a remote device (such as a DR). For details on working with the other two blocks, see Compressor and Parametric EQ Filter. Note that the Pager1's 2-band PEQ block does not allow the addition of more filters.
- Configure the paging stations Talk Mode to be either Push or Toggle. In Push Mode the talk button must be held down for the entire duration of the page. In Toggle Mode a single press of the talk button enables the mic for paging, but when the button is released the mic remains enabled for paging. The Pager1 will remain in paging mode until the talk button is pushed again.
- Select the font for all labels and values shown on the Pager1 device. You can choose between Times New Roman and Arial fonts.
note: Another feature to notice in the Pager1 properties dialog box is the area to the left that displays status indicators and a Talk button for this pager. When connected to a live, installed system, these indicators simulate what is happening on the actual pager hardware. But when working offline (or working online but with no paging hardware installed), these indicators as well as the Talk checkbox serve as valuable testing tools as they simulate what would be happening if the hardware were present. For more details on testing the pager and the paging system, see Testing Your Paging Configuration.
 See Also
- About Paging
- Adding and Configuring a Pager1 RAD
- Adding and Configuring a Paging Station Block
- Assigning Scenarios to a Paging Station
- Creating a HAL Paging System
- Large Restaurant with Multiple Zones and Pager1 Paging Stations
- Using a Standalone Paging Zone Block vs. a Zone Processor Block
- Working with Paging Scenario Priorities