You use a Selector preset in situations where multiple, mutually-exclusive presets are needed (typically for the same physical space). In other words, only one of the Selector presets that are grouped together can be active at a given time. Selector presets can be turned on (activated) and turned off (deactivated). To deactivate a Selector preset, you simply select another Selector preset in the list (which, of course, activates that preset). To allow deactivation of all the Selector presets in the list, you must include the No Selection option.
note: As you will see in the following procedure, the creation of Selector presets involves a step that is not required when creating Command or Toggle presets. By their very definition, Selector presets never stand alone. They are designed to be presented in groups of two or more. Therefore, the first step in creating a Selector preset is to create and/or select the Selector group to which the preset will belong.
To create a Selector preset:
- Click the Processing tab to open the Processing Workspace.
- Create your Processing Map, configuring the system as you want it to behave when this preset is activated. Set all your block values, create all your control links and make sure they are in the correct priority order, and customize all your names (blocks, links, DRs). If what you see in your Processing Map is exactly what you want returned when this Selector preset is activated, you are ready to continue.
-
In the Processing Workspace toolbar, click Presets to open the All Presets dialog box.
- Click the Selector tab.
- In the lower right corner of the dialog box, click the Selector button to add a new Selector group.
- Customize the name of the Selector group (not required but highly recommended) by clicking on its name and typing in the text edit box that appears. This name is for internal use only and is not displayed to the end user.
- In the lower right corner of the dialog box, click the Preset button to add a new Selector preset to the list.
- Customize the preset name by clicking its associated text symbol. If you link this Selector group to a DR, this is the name that end users will see on the LCD screen.
- Begin adding blocks to your preset. To add a block, click the preset bar at the bottom of the block and drag it onto the drop target associated with the preset you are creating:
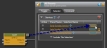
Alternatively, you can open the preset by clicking the preset name (which opens a dialog box showing more details about the preset) and then begin adding blocks. For more details, see Adding a Block to a Preset. - When you have completed the first Selector preset, repeat the above steps to add additional Selector presets to this Selector group.
- If you want to include a No Selection option in your list of presets, select the Include 'No Selection' checkbox. Including this option provides a way to deactivate all the presets in the Selector group (which will typically return included block parameters to their default, or Baseline, settings—as long as no other active presets include the same block).
- Link the preset to a remote device (assuming you want to give end users the ability to activate the Selector presets).
tip: You can add multiple blocks to a preset all at once. To do so, select multiple blocks by clicking and dragging your cursor over all the blocks you want or by pressing the Shift key as you click on each of the blocks you want. Then click and drag the preset bar of any selected block and drop it on the preset drop target. All blocks in the selected group are added to the preset.
 See Also