Testing External Controls
Since external controls participate in links just like any other HAL control, you can initially test the links within Halogen immediately after you create the controls and link them together. See Testing a Control Link for details on how to do this.
For external controls, however, there is more testing that you can do with Halogen even if you don’t have your HAL hardware yet. The same external control server that runs in the HAL hardware is built into Halogen. This means you can use Halogen to test external controls either with your real external control system or with a relatively simple ‘telnet’ connection.
The simplest way to get started is to run a telnet client application on the same PC you’re using to run Halogen. You can then connect the telnet client to the Halogen control server and use it to send and receive control system messages.
If you don’t already have a suitable telnet client installed on your PC see Using PuTTY to Test External Control Systems. Here we will use PuTTY as the telnet client – all screen shots are of a PuTTY window that is connected to the running Halogen application that is configured with one control of each type – Command, Level, Toggle, and Selector.
note: The built-in external control server is only available when Halogen is not connected to a HAL host device. Once connected to a HAL, Halogen shuts down its own control server, assuming that you’ll use the external control server that resides in the HAL.
To establish a telnet connection with the Halogen control server using a telnet client, connect to the localhost IP address on your PC (which is also IP address 127.0.0.1), port 4996. This is assuming that you are running the telnet client on the same PC as Halogen. If your telnet client is running on a different PC, you can use the IP address of your PC that is running Halogen in place of localhost.
Example Configuration
This section uses a HAL1 configuration that has four external controls configured and linked to other controls as follows:
A Command external control with number 0 linked to the Assert button of a Command preset
A Level external control with number 1 linked to the Level control of a Level block
A Toggle external control with number 2 linked to the Mute toggle control of a Level block
A Selector external control with number 3 linked to the selector control of a selector block selector that has four selections: Input 1, Input 2, Input 3, and Input 4.

- Open the External Control Systems dialog box by clicking on the Control Systems button toolbar in the processing workspace and click External Controls.
- In the dialog that opens, click on the Command tab.
- Open the property dialog for the Command external control by clicking on the hyperlink.
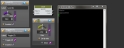
- Click on the button in the property dialog for the command control. (in the example above, this is the button labeled ‘Command Control’)
-
Observe that the string <C&0> appears in the putty telnet window:

This test tells you that the external control system (PuTTY) is connected and working with the Halogen control server. When you clicked on the Command button, the Halogen control system sent a ‘command’ message informing the external control system that the command with number 0 just fired.
-
Assert the Baseline preset in Halogen and observe that Baseline is now in the priority 1 position in the Active Preset list.
-
Send a ‘command’ message to the Halogen control server by typing <C&0> into the PuTTY window and pressing the Enter key. You should now see that the Command Preset is in priority 1 position in the Active Preset window because the external control system caused that preset to assert. (Remember that the Command external control is linked to the Command Preset Assert button)

- In the External Control Systems dialog click on the Level tab.
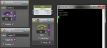
- Open the property dialog for the Level external control and set the level to 50% by typing 50 in the text box and then press the Enter key.
-
Observe that the Level external control and the Level block’s level control both change to be mid-scale and that the string <L&1&500> appears in the putty telnet window:
When you changed the Level external control from within the HAL system, the Halogen control server sent a ‘set level’ message, telling the external control system that the Level control with number 1 is now set to 50.0%.
-
Set a new value for the level control by typing the string <L&1&885> into the telnet window and then press the Enter key. The Halogen control server receives this message and sets the Level external control to a value of 88.5%, which causes the control in the Level block to become 0.5dB. This happens because the external control is linked to the control in the Level block.
- In the External Control Systems dialog click on the Toggle tab.
- Open the property dialog for the Toggle external control and observe that its state is currently unchecked.
- Send a ‘get toggle’ message to the Halogen control server for control number 2 by typing the string <T&2> into the telnet window and pressing the Enter key.
- Observe that <T&2&0> appears in the telnet window, which the Halogen control server sends in response to the ‘get toggle’ message. This tells the external control system that the current value of toggle control number 2 is 0, meaning that the toggle is un-checked.
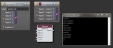
- Send a ‘set toggle’ message to the Halogen server to change toggle control number 2 to checked. Do this by typing <T&2&1> into the telnet window and pressing the Enter key.
- The Halogen control server receives this message and sets toggle control number 2 to the checked state, which also causes the Level block’s Mute toggle to become checked:

- In the External Control Systems dialog click on the Select tab.
- Open the property dialog for the Selector external control and observe that the selection is currently set to the first item (Input 1).
- Send a ‘get selection’ message to the Halogen control server by typing the string <S&3> followed by the Enter key. This asks the Halogen control server to send the current selection value for Selector control number 3.
- Observe that Halogen responds by sending <S&3&0> to the external control system, indicating that Selector control number has a current selection of 0.
- Send a ‘set selection’ message to select the third item in the list by typing the string <S&3&2> into the telnet window and pressing the Enter key.
- Observe that the Halogen control server receives this message and sets the selection to Input 3 on both the Selector external control and the Selector block control. Selections are counted sequentially, starting with 0 for the first item in the list.
-
Ask the Halogen control server for the number of selections in Selector external control number 3 by typing the string <SL&3> into the telnet window and then pressing the Enter key. This is a ‘get selector link’ message.
-
Observe that Halogen responds with the string <SL&3&4>, a ‘set selection link’ message indicating that Selector control number 3 has four selections.
-
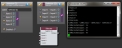
Now send a ‘get selection name’ message for each selection by typing in four messages: <SN&3&0> <SN&3&1> <SN&3&2> <SN&3&3> followed by the Enter key. This asks Halogen to send the names of each of the four selection items, which are numbered from 0 to 3.
-
Observe that the Halogen control server responds with four ‘set selection name’ messages: <SN&3&0&Input 1>, <SN&3&1&Input 2>, <SN&3&2&Input 3>, and <SN&3&3&Input 4>. These messages inform the external control system of the display names for each of the four selections in selector control number 3. These are the same strings that appear in the LCD-like text boxed for the Selector external control:
note: Even though the Halogen control server sends ‘set selector link’ and ‘set selection name’ messages to the external control system, you can’t change the number of selections or the names by sending these messages to Halogen. They are a one way only type of message, meant to inform an external control system of the state of the selector controls so that it can update its own configuration if desired.