All Presets Dialog Box
- Click the Processing tab to open the Processing Workspace.
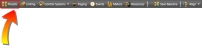
- On the Processing Workspace Toolbar, click Presets:
Provides a central location for:
- viewing currently configured presets
- viewing which presets are active
- configuring new presets
- establishing a control link between a preset and a remote device

| UI Element | Purpose |
|---|---|
| Tabs (Toggle, Selector, Command) | Every preset has a Preset Control Type . Each tab in this dialog box displays a list of all presets of that type. In other words, all the Toggle presets are displayed on the Toggle tab, Selector presets on the Selector tab, and Command presets on the Command tab. See About Presets for more details on the control types. . Each tab in this dialog box displays a list of all presets of that type. In other words, all the Toggle presets are displayed on the Toggle tab, Selector presets on the Selector tab, and Command presets on the Command tab. See About Presets for more details on the control types. |
|
Toggle tab elements
|
Select the Active checkbox to activate a preset, deselect the checkbox to deactivate the preset. Provide end users with the ability to activate/deactivate a preset by linking its Active Toggle control to a remote device such as a DR2 or DR3. Click the preset name to open its individual Preset dialog box. Click the edit icon next to the preset name to open a text edit box in which you can customize the preset name. Add a block, control, or link to a preset by dragging the block or control's preset icon and dropping it on the preset's blue <Add> box. note: If you add a block, control, or link that is already in the preset, the system simply updates its values in the preset to match those of the current block, control, or link. Click +Preset to add a new Toggle preset. Click +Duplicate the make a copy of the selected preset. The new preset will include all of the blocks, controls and links of the original, but have a new, unique name. Click Move to move the selected preset to the Selector or Command tab (effectively changing the preset's control type). Delete a preset by hovering the mouse over the preset in the list and then clicking the red X in the far right column. |
|
Selector tab elements
|
Click +Selector to add a new Preset Selector Group. Highlight a Selector group by clicking anywhere on it, and then click +Preset to add a Selector preset to the group. Within a Preset Selector Group, you can do the following:
In the area just above Active Presets, use the Order arrows to change the order of presets within a Preset Selector Group. To do so, highlight the preset by clicking it, and then use an arrow to move the preset up or down in the list. Use the +Selector and +Preset buttons to add more Preset Selector Groups and presets (as described above). Click +Duplicate the make a copy of the selected preset and add it to the selector. The new preset will include all of the blocks, controls and links of the original, but have a new, unique name. Use the Move button to move the selected preset to the Toggle or Command tab (effectively changing the preset's control type). Delete a single preset from a Preset Selector Group by hovering over the mouse over preset in the list and then clicking the red X in the far right column. |
|
Command tab elements
|
Click an Assert button to assert its corresponding preset. Provide end users with the ability to assert a preset by linking its Assert Command control to a Command control on a remote device such as a DR2, DR3, or Logic In port. Click the preset name to open its individual Preset dialog box. Click the edit icon next to the preset name to open a text edit box in which you can customize the preset name. Add a block or control to a preset by dragging the block or control's preset box and dropping it on the preset's blue <Add> box. Click +Preset to add a new Command preset. Click +Duplicate the make a copy of the selected preset. The new preset will include all of the blocks, controls and links of the original, but have a new, unique name. Click Move to move the selected preset to the Selector or Toggle tab (effectively changing the preset's control type). Delete a preset by hovering the mouse over the preset in the list and then clicking the red X in the far right column. note: The Baseline preset is a Command preset and is always present in the list on the Command tab (because it cannot be deleted). Unlike other Command presets, you cannot edit the Baseline preset name or move the Baseline to another control type. By default, the Baseline contains all blocks, controls, and control links in your Processing Map. Dragging and dropping a block into the Baseline updates that block's property values in the Baseline preset. |
| Active Presets area |
Displays all the currently-active presets (of all types) in priority order, which is the order in which they have been activated/asserted. When a Toggle or Selector preset is deactivated, it disappears from the list (returning only if it is reactivated). The Baseline is always present in this list. The Scratch Pad column indicates if a preset's Scratch Pad is enabled, and displays nothing if the Scratch Pad is disabled. The Active Presets list is visible on each of the three tabs. |


 See Also