User Interface Reference
EXP Properties Dialog Box
- After adding an EXP device to the EXP Navigation Panel, double-click the EXP or hover over it and click the properties icon that appears:
For viewing and configuring properties specific to an EXP device.
Below is the image of the EXP properties dialog box for all expansion devices except EXP2x. The table below lists all the properties you may encounter and provides a definition of each.
| UI Element | Purpose |
|---|---|
| Title Bar Name | Area at the top of the properties dialog box that displays the EXP's Device Name as well as the HAL device model, the HAL port to which the EXP is connected, and the EXP model: 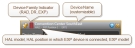 |
| Device Name |
A customizable name for identification purposes when working within Halogen. This name does not appear on the EXP device itself. Edit the name in the text field provided. note: You can also edit the EXP's name by clicking the name in the port bar above the EXP in the Hardware Map and typing a custom name in the edit box that appears. |
|
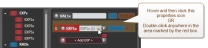
Locate (only when connected to HAL) |
This button appears when connected and allows you to enable the locate state for the EXP. When in locate state, the indicator LEDs on the front and rear panels of the EXP blink to help you locate the device in your rack. note: You can also enable locate by clicking on the locate indicator on the EXP in the hardware workspace. |
|
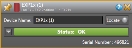
Status indicator/drop down (only when connected to HAL) |
The status indicator appears when connected to HAL and displays the overall status of the EXP. For more details about the EXP status, click the drop down arrow to expand the status panel. |
|
Serial Number (only when connected to HAL) |
When connected, the serial number of the connected EXP is displayed. |
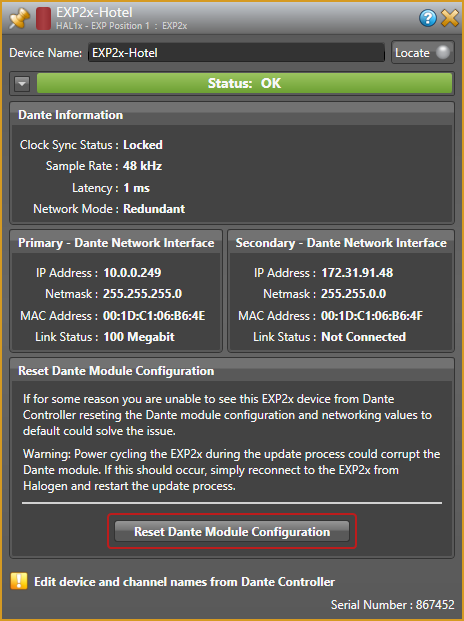
Below is the image of the EXP2x properties dialog box when connected to a HAL1x. The table below lists all the properties you may encounter and provides a definition of each.
| UI Element | Purpose |
|---|---|
| Title Bar Name | Area at the top of the properties dialog box that displays the EXP's Device Name as well as the HAL device model, the HAL port to which the EXP2x is connected, and the EXP model: 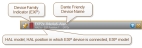 |
| Device Name |
The Dante Device name is for identification purposes when working within Halogen. This name is read-only in Halogen, but you can edit it with Dante Controller software. See https://www.audinate.com/products/software/dante-controller. note: Even though the Device Name is provided by the Dante network, Halogen saves it in the configuration file for convenience when you are working when not connected to a HAL. note: The default Dante Device name includes the final six characters of the EXP2x’s Dante card (Brooklyn II module). This may be useful information on networks with many Dante devices. Especially when monitoring an Ethernet network with IT software tools such as Wireshark. |
|
Locate (only when connected to HAL) |
This button appears when connected and allows you to enable the locate state for the EXP2x. When in locate state, the indicator LEDs on the front and rear panels of the EXP2x blink to help you locate the device in your rack. note: You can also enable locate by clicking on the locate indicator on the EXP in the hardware workspace. tip: You can also use the Dante Controller Identify function to turn on the EXP2x Locate LED. Because Dante Controller does not provide a way to turn Locate off, the EXP2x includes a 5 minute timeout, which automatically turns off the Locate LED after the Identify function has turned it on. |
|
Status indicator/drop down (only when connected to HAL) |
The status indicator appears when connected to HAL and displays the overall status of the EXP. For more details about the EXP2x status, click the drop down arrow to expand the status panel. |
|
Serial Number (only when connected to HAL) |
When connected, dialog displays the serial number of the connected EXP2x. |
| UI Element | Purpose |
|---|---|
| Clock Sync Status |
Shows the audio clock status: Locked or Unlocked |
|
Sample Rate |
Indicates the audio sample rate for the device: 44.1 kHz, 48 kHz, 88.2 kHz or 96 kHz. |
|
Latency |
Indicates the audio latency of the device: 250 µS, 500 µS, 1 mS, 2 mS, or 5 mS. |
| Mode | Switch or Redundant. If you have configured the secondary port as Switch, the port behaves as an Ethernet switch connected with the Primary port. Alternately, if you have configured the secondary port as Redundant, the port is independent from the Primary port, intended to be connected to the Dante secondary network. |
| UI Element | Purpose |
|---|---|
| IP Address | Shows the IP Address assigned to the primary Dante Ethernet interface. |
| Netmask |
Shows the IP subnet mask |
|
MAC Address |
Shows the MAC address |
|
Link Status |
Not Connected, 10 Megabit, 100 Megabit, or 1 Gigabit. |

| UI Element | Purpose |
|---|---|
| IP Address | Shows the IP Address assigned to the secondary Dante Ethernet interface. |
| Netmask |
Shows the IP subnet mask |
|
MAC Address |
Shows the MAC address |
|
Link Status |
Not Connected, 10 Megabit, 100 Megabit, or 1 Gigabit. |
| UI Element | Purpose |
|---|---|
| Reset Dante Module Configuration button |
Resets the Dante module configuration for the EXP2x. This sets the device name, the channel names, and the settings, including the network configuration, to factory defaults. Click this button if you are unable to discover or connect to the EXP2x from Dante Controller software. warning! Do not cycle the EXP2x power after clicking on the Reset Dante Module Configuration button until the process is complete. Doing so could corrupt the Dante module. If this should occur, simply reconnect to the EXP2x from Halogen and restart the Reset process. |
 See Also