Pink Noise: Ramped
The Ramped Pink Noise block generates a pink noise signal and has the ability to ramp the amplitude of that signal between a specified minimum and maximum over a specified time (from 6 seconds to 3 hours). The amplitude is ramped logarithmically, to produce a linear ramp in the perceived volume over time.
Use the Ramped Pink Noise block to increase and/or decrease a generated pink noise audio signal over time for noise masking applications.
- Click the Processing tab to open the Processing Workspace.
- In the palette area, click the DSP tab.
- Expand the Misc: level, delay, meter... category of blocks.
- Click and drag the Pink Noise: Ramped block into your Processing Map.
- Wire the output from the Pink Noise: Ramped block to the appropriate block.
- (Optional) Customize the names of the block and the output node by clicking their current name and then typing the custom name in the text box that appears. Click the X to save the name.
- Open the Ramped Noise block's properties by double-clicking the block or hovering and clicking the properties icon that appears in the upper right of the block's title bar. From here you can do the following:
- Set the Maximum Amplitude of the pink noise output to the level of noise masking required when the facility is at its busiest (e.g., 9am-4pm).
- Set the Minimum Amplitude of the pink noise output to the level of noise masking required when the facility is at its quietest (for example, early morning or later in the evening).
- During the quiet times of day, the maximum pink noise required for noise masking during peak hours may be noticeable. Adjust the Ramp Time to bring the audio from its Minimum Amplitude to Maximum Amplitude slowly enough to avoid notice, but quickly enough to get the noise masking system up and running before peak hours.
- Connect to a HAL device to test out the settings using the Up, Down, Pause, Go To Max, and Go To Min buttons.
- Give your facilities management personnel control over the noise masking system by linking DR2 or DR3 command controls to the Up and Down buttons. For automatic control based on the time of day, consider wiring the logic outputs of a time clock to the Logic In ports, and link the Logic In command controls to the Up and Down buttons.
- View the Ramp Progress bar which displays a visual representation of the Ramp settings. When connected to a HAL, the real-time ramp value is displayed.
- View the Output meter which indicates the pink noise signal’s rms and peak amplitudes in dBFS and dBr.
note: The Pink Noise: Ramped block is muted by default.
| UI Element | Purpose |
|---|---|
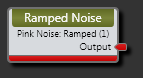
| Output node | Connection point for wiring the pink noise output |
(Hover over the thumbnail below to view the properties dialog box.)

| UI Element | Purpose |
|---|---|
|
Ramp Progress |
A visual representation of the Ramp configuration. When connected to a HAL, the current ramp amplitude is displayed. |
| Minimum Amplitude |
Represents the minimum amplitude of the pink noise output. Set it to the level of noise masking required when the facility is at its quietest. Range is -100 dBr to -2 dBr. Default = -88 dBr |
| Maximum Amplitude |
Represents the maximum amplitude of the pink noise output. Set it to the level of noise masking required when the facility is at its busiest. Range is -87 dBr to 0 dBr. Default = 0 dBr |
| Ramp Time |
Specifies the time over which the pink noise ramps from its Minimum Amplitude to its Maximum Amplitude. Range is 0.1 to 180.0 minutes. Default = 1.0 minute |
| Control Buttons |
Use these buttons to control and test the pink noise output. Down lowers the amplitude, Up raises the amplitude, Pause pauses the signal, Go to Min lowers the amplitude to its configured minimum, and Go to Max raises the amplitude to its configured maximum. These buttons are active only when connected to a HAL. Provide end users with control over raising and lowering the amplitude by linking the Down and Up controls to a DR2, DR3, or Logic In command control. |
| Output (Meter) | Indicates the pink noise signal’s rms and peak amplitudes in dBFS and dBr |
| Mute |
Mutes the block's output Default = Checked (muted) |
 See Also