Graphic EQ Filter
The 30-band Graphic EQ block offers a familiar slider-based interface for making frequency response adjustments in 1/3-octave divisions. The Graphic EQ block also includes Rane Corporation’s patented Perfect-Q algorithm, which eliminates filter band interaction, producing a perfect 1/3-octave response that exactly matches EQ slider positions.
Perfect-Q features virtually no band interaction and extremely low ripple between adjacent bands. The result: the world’s first graphic equalizer whose output response precisely matches slider settings.
Perfect-Q characteristics:
• What you see is (really) what you get.
• Constant bandwidth for all slider settings.
• Adjusting one band does not change neighboring bands.
• Improved phase response due to eliminated interactions.
• No band interaction overload problems.
Early EQs used passive analog networks resulting in a proportional-Q (also known as variable-Q; “Q” is inversely proportional to filter bandwidth) response, that is, the filter bandwidth became wider or narrower depending upon the slider setting. While producing smooth alteration of frequency response, proportional-Q designs have significant interaction between adjacent bands. For certain applications this interaction results in a “sound” some listeners grew to appreciate, even at the expense of poor correlation between overall response and slider position.
Simply put, use Perfect-Q to make precise adjustments when “ringing out” or flattening the response of a speaker system. Use Proportional-Q when broader tone-shaping or creative EQ adjustments are desired.
- Click the Processing tab to open the Processing Workspace.
- In the palette area, click the DSP tab.
- Expand the Filters category of blocks.
- Click and drag the Graphic EQ block into your Processing Map.
- Wire it into your system in the appropriate location.
- (Optional) Customize the names of the block and the input and output node by clicking their current name and then typing the custom name in the text box that appears. Click the X to save the name.
- Open the Graphic EQ block's properties by double-clicking the block or hovering and clicking the properties icon that appears in the upper right of the block's title bar. The properties dialog box displays a plot of the Graphic EQ’s frequency response and a slider for each of its 30 filters. From here, you can do the following:
- Set the block to use a Perfect-Q or traditional Proportional-Q algorithm using the radio buttons in the Filter Type box. See the Functionality section above for more details on the differences between Perfect-Q and Proportional-Q.
- You may also choose to limit the Range of the sliders to +/- 6 dB or to only provide attenuation (12 dB cut-only). Using the cut-only mode ensures that EQ settings cannot add gain.
tip: If you are using the Graphic EQ block to manage the frequency response of a space with multiple uses, you may find it necessary to save its settings in a preset and then recall different presets as the space changes. Once you’ve got a set of EQ settings stored in a preset, reconfigure your room for its next use and click the Flatten All button to quickly return to a flat frequency response.
Bypass the block by selecting the Bypass checkbox in the lower right corner of the dialog. Doing so effectively turns the Graphic EQ block into a wire.
note: The frequency response graph goes flat in bypass mode to accurately reflect the response of the block. However, the EQ sliders remain in their respective positions, so that the frequency response returns to your settings when bypass is disabled.
| UI Element | Purpose |
|---|---|
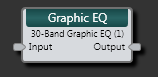
| Input node | Connection point for wiring input to the Graphic EQ block |
| Output node | Connection point for wiring the Graphic EQ output to another block |
(Hover over the thumbnail below to view the properties dialog box.)

| UI Element | Purpose |
|---|---|
|
Response graph |
Plot of the frequency response. |
| Frequency sliders | Sliders for making frequency response adjustments in 1/3-octave divisions. Hovering over each slider shows the current slider value in a popup windows above the slider. |
| Filter Type options | Choose the filter type to be used by the block. See the Functionality section above for more details on the differences between Perfect-Q and Proportional-Q. |
| Range options | Limit the Range of the sliders to +/- 6 dB or to only provide attenuation (12 dB Cut-Only). Using the 12 dB Cut-Only mode ensures that EQ settings cannot add gain. |
| Flatten All | Click to return to a flat frequency response. |
| Bypass | Selecting this checkbox bypasses all filters, effectively turning the Graphic EQ block into a wire. The frequency response graph goes flat, but the EQ sliders remain in their respective positions, so that the frequency response returns to your settings when Bypass is disabled. |
 See Also