Getting Started
Overview of Stardraw Control Application Development
The overall approach for developing a Stardraw Control application is to:
- Select drivers for devices you want to use and drag them to the topology canvas
- Wire the drivers together according to application’s needs and available communications ports
- Create a custom user interface by dragging panels and controls to a form
- Connect the controls to the driver by creating actions for available driver and control events
You do all of this in the Stardraw Control authoring application, which also allows you to run your control application under a debugger, test your application, and make changes as necessary.
Once your Stardraw control application is ready for end users, you compile it to an executable file and deploy it to the target system.
Importing the Example Stardraw Project
To get the most out of this guide, you should import the example into the Stardraw Control 2010 authoring application. The example project includes the example application built on the example HAL1 driver.
To import the example project, do the following:
- In the Stardraw Control 2010 authoring application, select the File menu and click on Import Project.
- In the dialog that appears, navigate to the Halogen Stardraw Example directory and click on the HalExampleProject.s03 file, then click the Open button.
- When the Project Details window appears, enter a suitable Project Name and Project Description.
- Click on the Panels tab and check that the Executable Path is valid. If not, change it to a path that exists on your PC.
- Click OK.
- Save your new project by clicking on the floppy disk icon in the Stardraw toolbar.
When you are finished, the Stardraw Control topology will look similar to this:

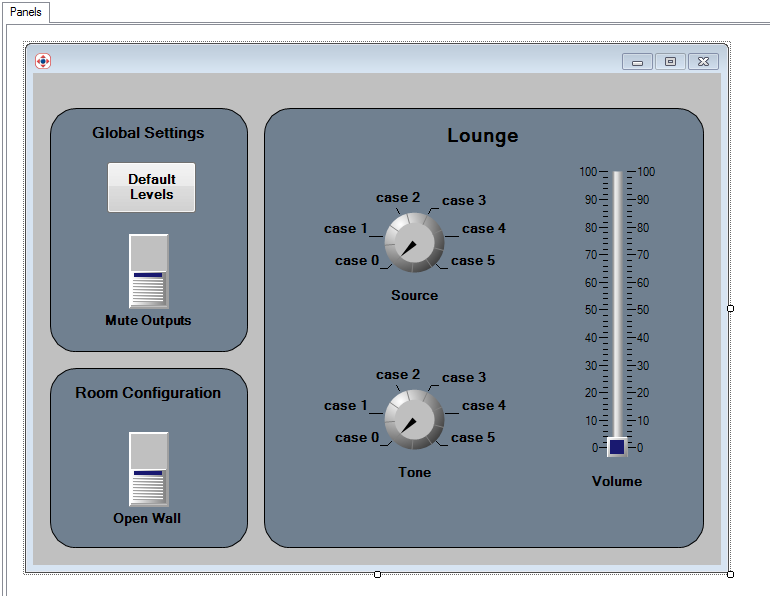
Switch to the Forms tab in the Stardraw authoring application by clicking on the Forms tab at the bottom left of the Stardraw window and you will see that the basic application form looks like this:
You can run the application and see how it works by doing the following:
- Start Halogen by double clicking on the Halogen icon of your PC.
- After Halogen starts, open the example HAL1x configuration file, ControlSystemSample.hal, that resides in the Halogen Stardraw Example directory. Do this by clicking on the Open button in Halogen and navigating to the directory and selecting the file.
- Run the Stardraw application under the debugger by clicking on the blue arrow in the Stardraw toolbar (Run Program.)
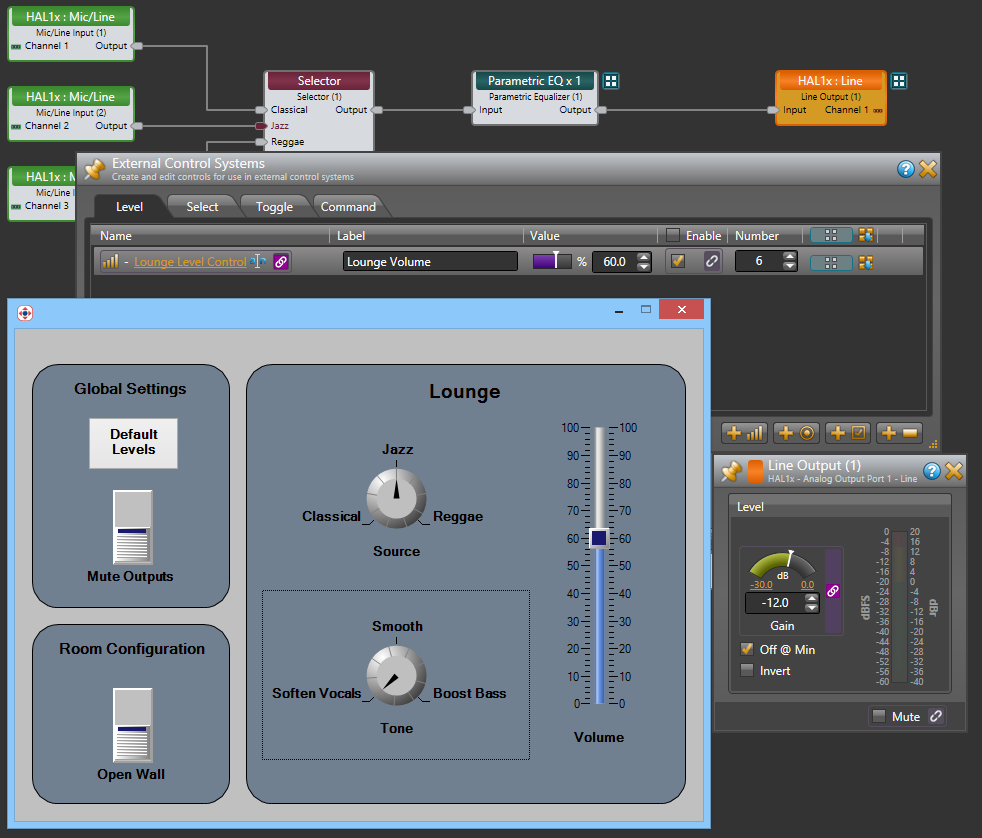
- When the Stardraw panel appears, use the controls to change the setting of the external controls that are included in the HAL configuration.
For example, open the HAL1x lounge output block in the Halogen processing map. Also open the Control Systems property dialog, change to the Level tab and click on the Lounge Level Control hyperlink. If you watch the three level controls (Stardraw Volume, Lounge Level Control, and Line Output (1)), you will see they all track each other, regardless of which one you actually change on the screen.
If the Stardraw application cannot connect to Halogen or the controls do not work correctly, see the Troubleshooting topics at the end of this section.